Blog
Local Kubernetes Development Using Minikube and Redis Enterprise

Kubernetes is an open-source container orchestration system used to deploy, scale and manage containerized applications. Kubernetes is a project hosted by the Cloud Native Computing Foundation (CNCF). At a very high level, it contains two types of resources: a master node (which is the cluster coordinator) and nodes, which are the workers that run containerized applications.
Minikube is a tool used to run a Kubernetes cluster on a local machine. Minikube is a single-node Kubernetes cluster inside a VM on your laptop. Minikube can be used to try out Kubernetes and or develop with it day-to-day.
The Redis Enterprise offering extends Redis, the most popular database used with Docker containers. Redis Enterprise delivers high performance, low latency and high availability to organizations. This blog post will show you the basics steps needed to setup Minikube and run a 3-node Redis Enterprise cluster on your local laptop.
Installation
We are going to use the homebrew package manager to install minikube and kubernetes command line tool on your local laptop.
Starting Minikube
Minikube offers the ability to change the Virtual Machine (VM) driver. For this blog post, we used the vmwarefusion driver.
The output of the command should look like:
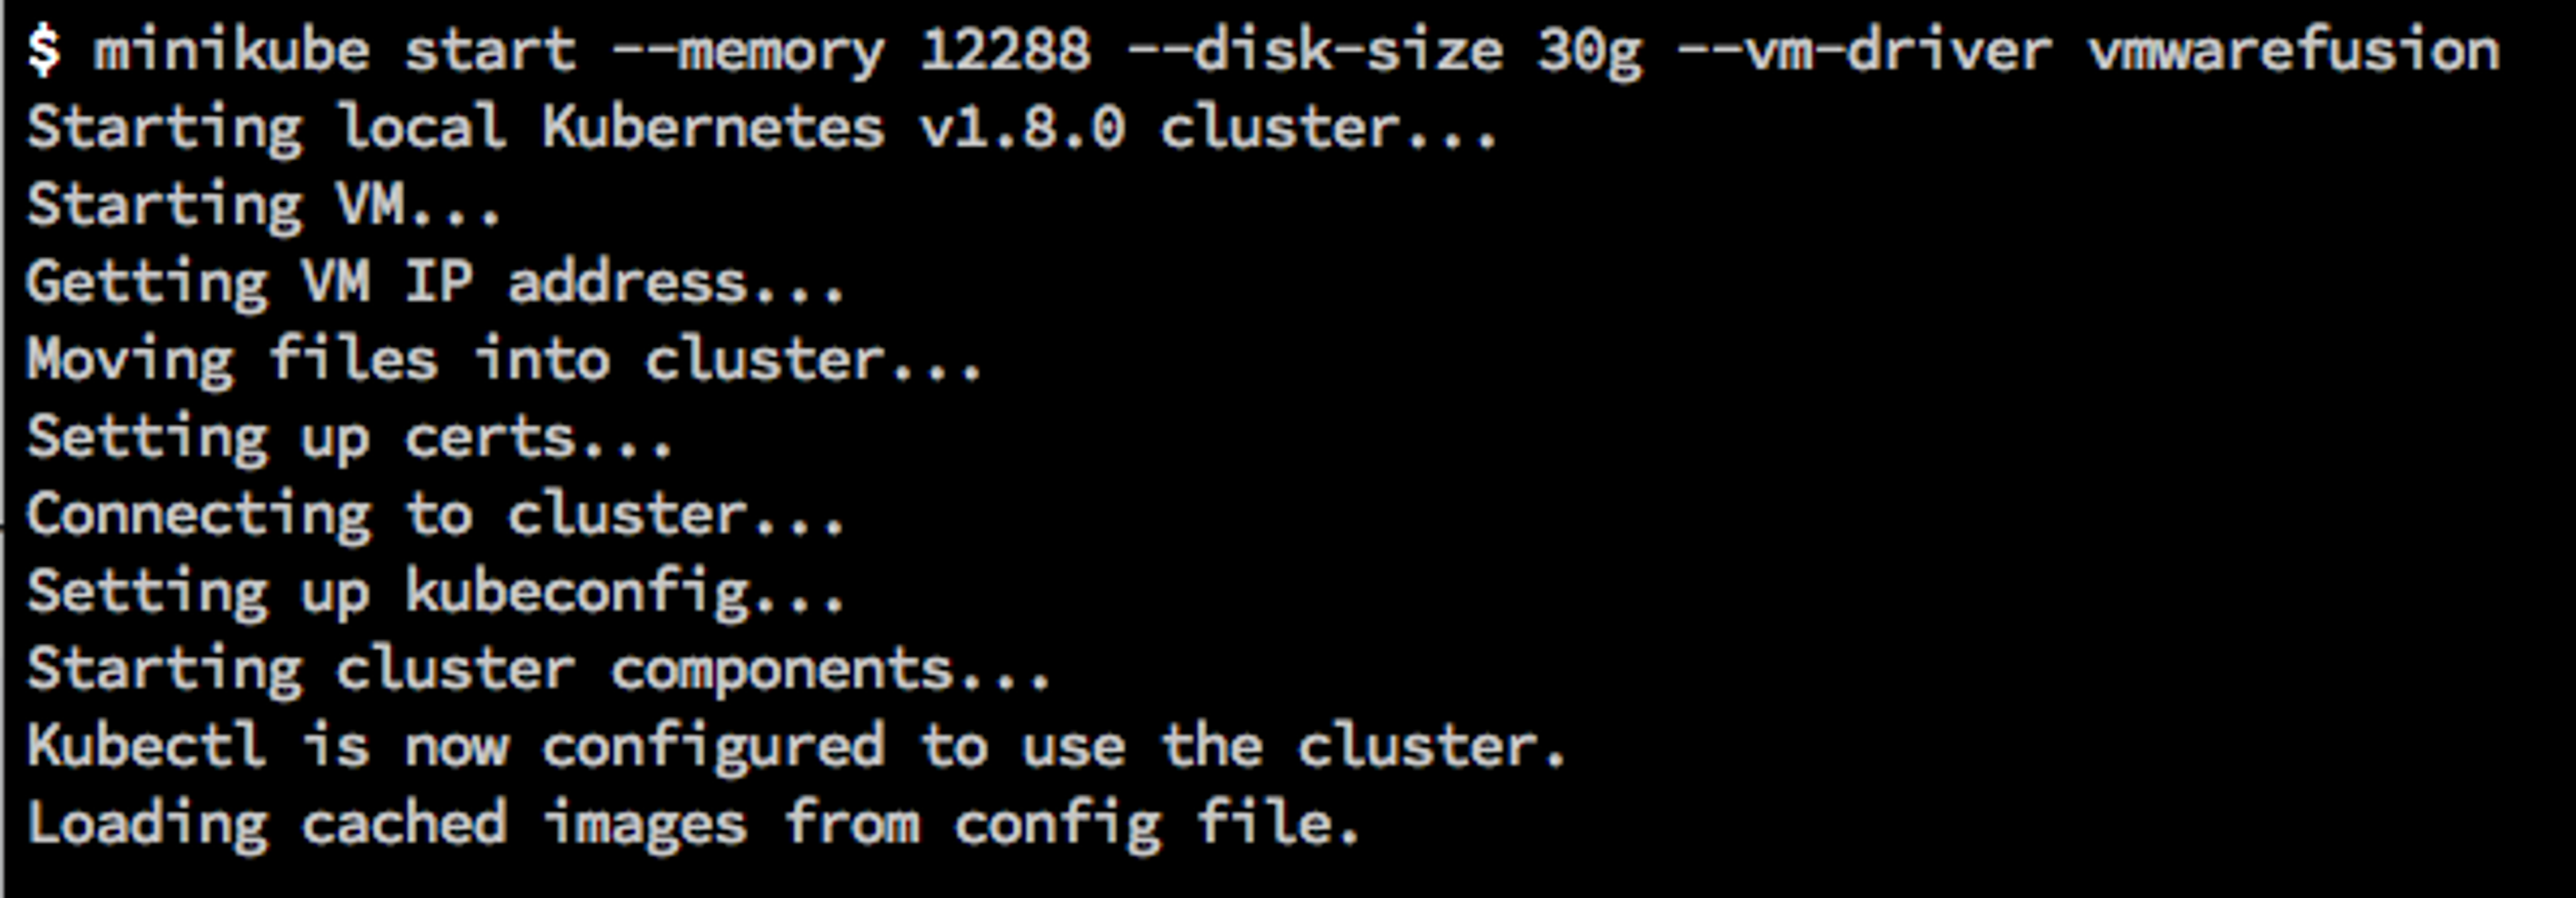
Minikube startup output
Verify Minikube installation
We will use the Kubernetes command-line tool, kubectl, to verify the Minikube installation. You can verify the Minikube install using:
The output should look like:
Redis Enterprise on Minikube
Installation
Minikube is now running on your laptop and kubectl cli was able to successfully query the master node to get the status of the cluster. We will now deploy the Redis Enterprise service in Minikube with three replica sets. The yaml configuration for the Redis Enterprise deployment and service can be found here.
We will use the yaml to create the deployment and service in the Kubernetes cluster.
We can verify that three pods were created by issuing the command

Output: kubectl get pods -o wide
Prerequisite for Cluster Configuration
We need to change the binding of the CCS from local loopback address 127.0.0.1 to 0.0.0.0.
Configuration of Cluster
We need to setup the Redis Enterprise cluster as a master node by logging into the pod and issuing a `create cluster` command.
We will use the rladmin utility to create the new cluster:
We will use the rladmin utility to join the 2 nodes to cluster
and
Database creation on cluster
We will use the Rest API of Redis Enterprise to create a database on the master node:
We can look at the status of the cluster and database using the rladmin utility included in Redis Enterprise download:
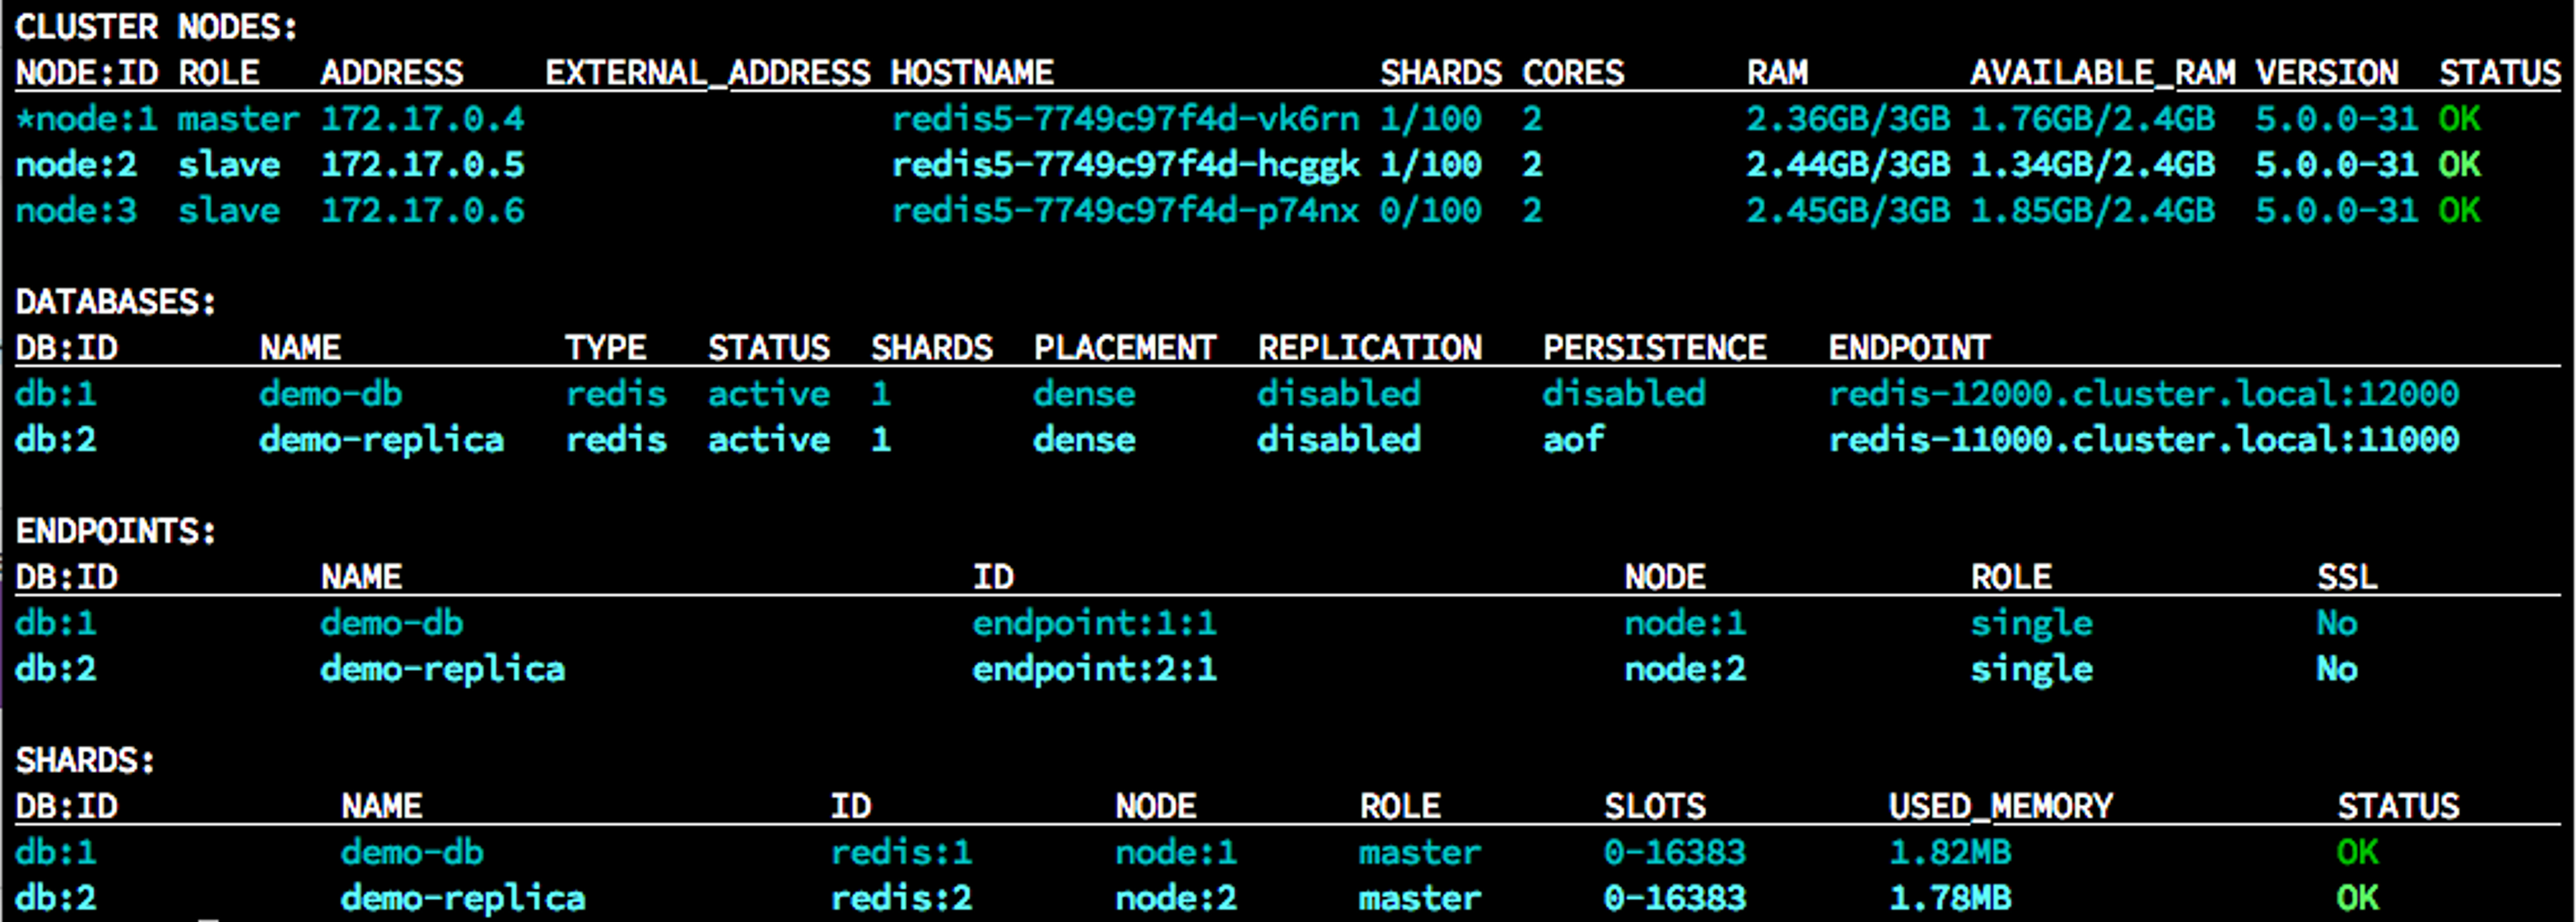
rladmin cluster status
- You can read more about Redis Enterprise’s shard placement policy and proxy policy on our documentation page.
- Redis Enterprise includes replication and persistence by default. You can read about persistence on our Redis Enterprise database documentation page.
Redis Enterprise Dashboard access
You can access the Redis Enterprise dashboard, which is running on port 8443, by setting up a secure tunnel between local port and the pod port. Once the tunnel is established, you can reach the Redis Enterprise dashboard at https://127.0.0.1:8443:
kubectl port-forward <my-pod-name> <localport>:<pod-port>
Example: kubectl port-forward redis5-58dc568c56-7qk22 8443:8443
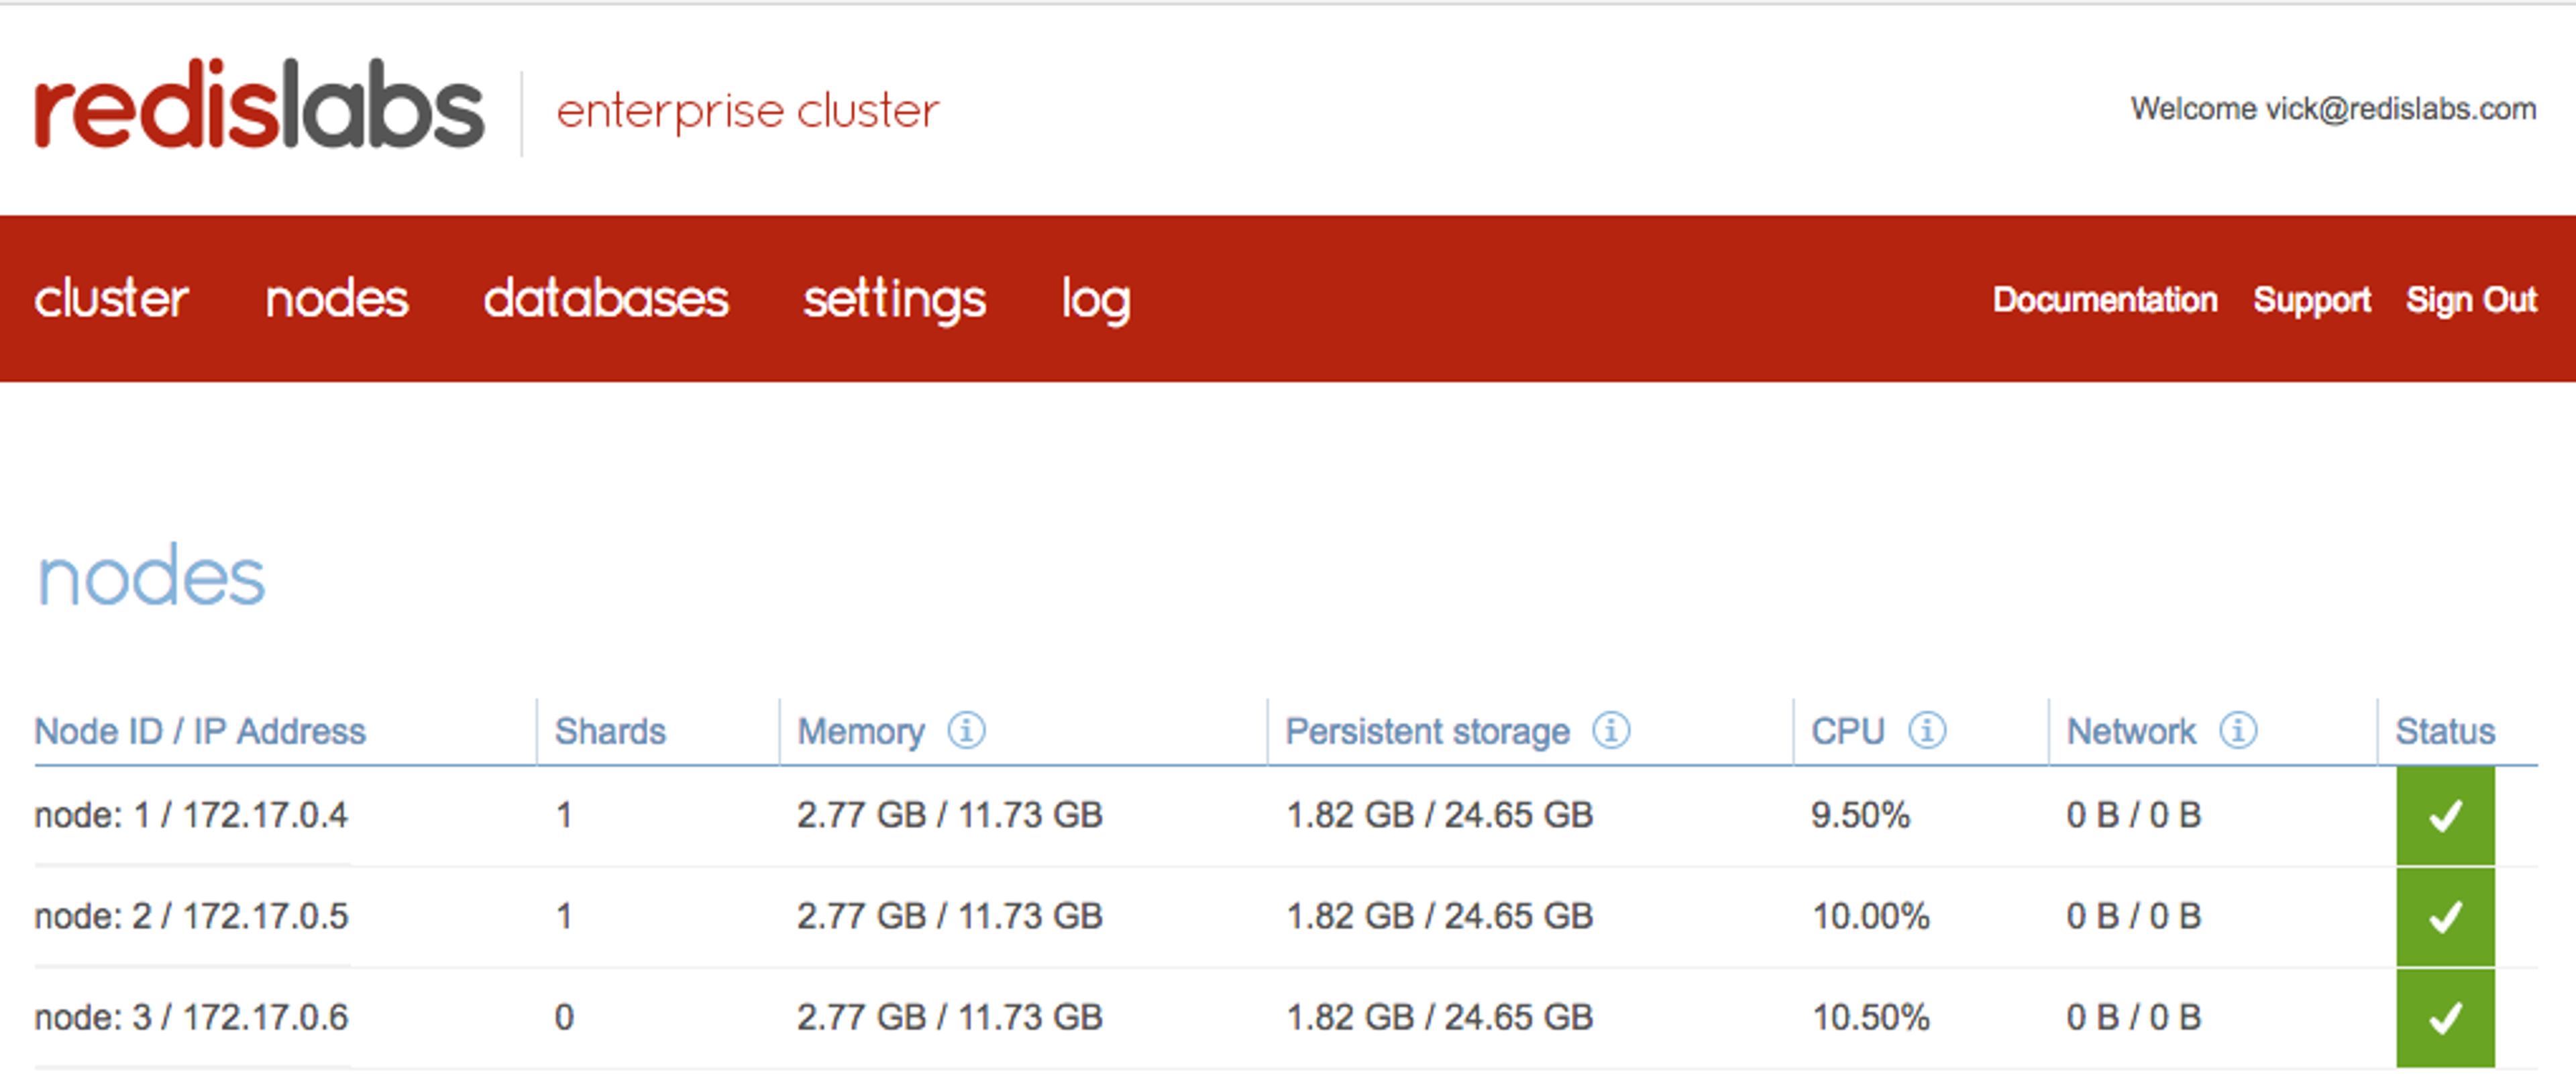
Redis Enterprise Dashboard – Nodes
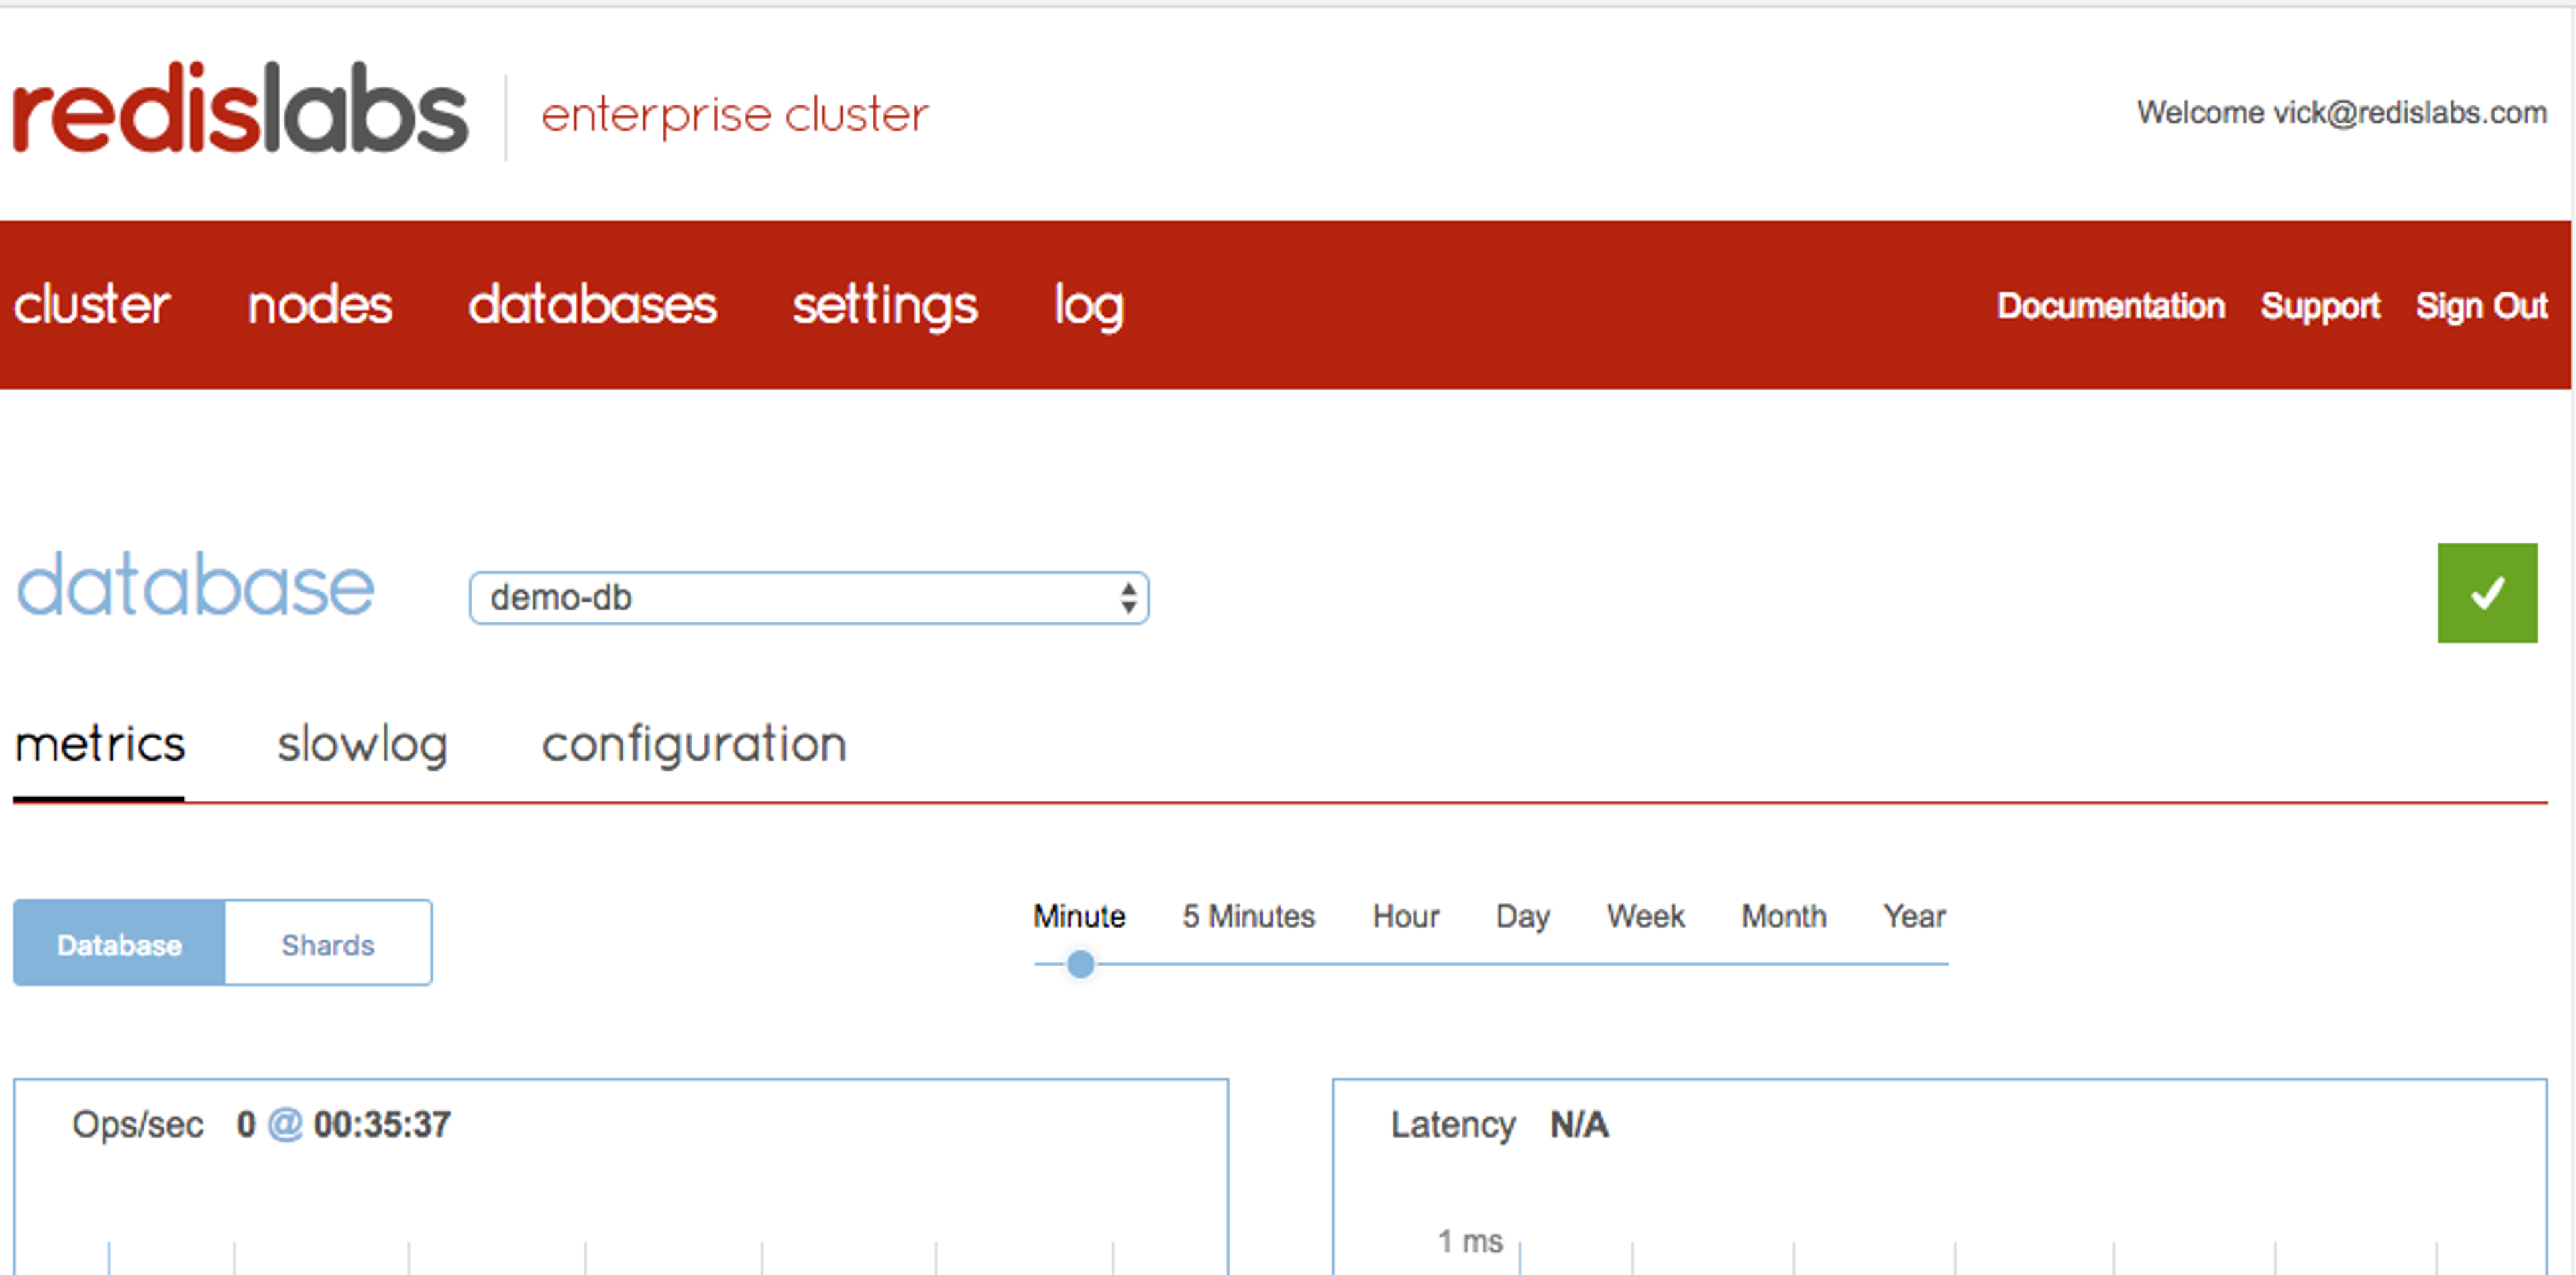
Redis Enterprise Dashboard – Database
Local access to Redis Enterprise
You can connect to your database using the IP of the node and the port specified during database creation:
What’s next
We are working on a Kubernetes native Redis Enterprise container that will take advantage of the new primitives introduced in Kubernetes 1.8 and above. We are working on releasing a new version of the Redis Enterprise container image that will leverage both the new Persistent Sets and the Storage class primitives while providing a better cluster bootstrapping experience. In the meantime, learn more about the Redis Enterprise offering.
Get started with Redis today
Speak to a Redis expert and learn more about enterprise-grade Redis today.